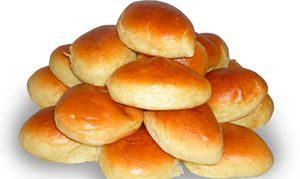
 Сегодня готовим дрожжевые печеные пирожки.
Этот рецепт на английском я писала специально для американки.
Пирожки получаются мягкие воздушные.
К слову сказать, наши русские пирожки у нее удались с первого раза.
Американцы вообще любят нашу кухню.
Итак, давайте приступим.
How to make very yummy Russian piroshky — Как приготовить очень вкусные русские пирожки
So, we need follow ingredients:
One glass of warm milk /200 ml/,
One egg,
75 grams of butter,
Dry or wet yeast that you usually use.
One teaspoon of salt,
A teaspoon of sugar,
250 grams of sifted flour,
2 teaspoon of vegetable oil.
Method
In warm water or milk (half a cup), add the yeast and sugar. Thoroughly mix it.
And leave for 15-20 minutes in a warm place.
Then take the milk, make sure it is warm, at room temperature or about 30-35 degrees C (like the milk you give to small baby).
Add the yeast in the milk and mix well.
Then add salt and sugar.
Make sure to mix thoroughly.
Now add some flour .. mixing it in till you get to the consistency of sour cream.
And thoroughly mix again.
Set the bowl aside.
Melt butter.
Allow it to cool a little, until it becomes only warm, and add it to the egg.
Here, too, add a little flour, and mix well.
Then we should add this mixture to the bowl with milk and yeast.
Thoroughly mix everything and gradually add the flour.
The dough should be very carefully kneaded — about 10 minutes.
Look, the dough is very soft, and does not stick to your hands.
At the end add 1-2 teaspoons of vegetable oil.
Everything once again mix well by hand.
I do it already on the table.
Well, the dough is well mixed.
Put it back in the bowl, cover with a cloth or kitchen towel and give the dough time «to rest».
Dough should stand in a warm place for about 35 to 40 minutes — depending on the yeast and flour, which you used. Usually we put the dough in a warm place close to the radiator. But it’s summer now and we have the radiators disconnected, therefore, the dough will rise only slightly.
Well, one hour has passed – the dough has risen.
We spread it back on the table and knead again to get rid of all the carbon dioxide.
Now again we put the dough in a bowl, cover with a kitchen towel, put it in a warm place and wait for the dough to rise for the second time.
It has been 30 minutes, see how much our dough has risen.
Knead it again.
Now, we shape small balls with the dough.
I like to make small piroshkys — but you can make larger ones if you want.
We cover them with plastic wrap and leave for 15 minutes.
It has been 15 minutes, the balls have risen a bit.
Now we start to sculpt piroshky.
We make little pancakes with the palms of our hands.
Then put the filling in the center of each pancake.
Press the edges together.
On a baking sheet put baking paper or grease the pan with vegetable oil.
When all the piroshky are ready, we put them on a baking sheet and leave them for 20-30 minutes to get them risen.
It has been 25-30 minutes, piroshky have risen, now brush them with egg and put them in the oven.
Bake piroshky at 180-190 degrees until brown, for approximately 15-20 minutes, depending on the oven!
Here are critical tips of making piroshky — вот важные советы приготовления пирожков
Use only tested fresh yeast!
Use flour only of the highest grade!
The milk should be warm!
Approximate time of kneading — 10 minutes!
Do not open the oven during baking!
In the oven, we put a pan of water for better baking.
The kitchen should not be a drafty!
If the kitchen is cool — the dough will rise badly!
Usually we put the dough next to the radiator or gas stove – for warmth!
After baking piroshky it is necessary to grease with butter.
Make sure you get good mood!
Also, the dough doesn’t like loud sounds.
Enjoy!